Organizing
Tags
Creating tags, nesting them inside each other, applying them to tasks, and filtering by them.
Tags cut across projects. A task can carry any number of them, and selecting a tag in the sidebar shows every task with that tag from every project. Tags can be nested inside other tags, as many levels deep as you like, and every level keeps its own icon and color.
Creating a tag
Any of these:
- + ▸ New Tag at the top of the sidebar.
- Right-click or press and hold an existing tag and choose New Nested Tag to create one inside it.
- From any task's context menu, Add Tag ▸ New Tag… creates the tag, attaches it to the task, and opens the editor.
- In a task's Tags sheet, type a name in New tag name and tap Add.
- Through Shortcuts or an AI assistant, a tag name that matches nothing creates the tag.
A tag closed without a name is called "New Tag" until you rename it.
The tag editor
Right-click a tag and choose Edit Tag, or tap it while in Edit mode. The editor has:
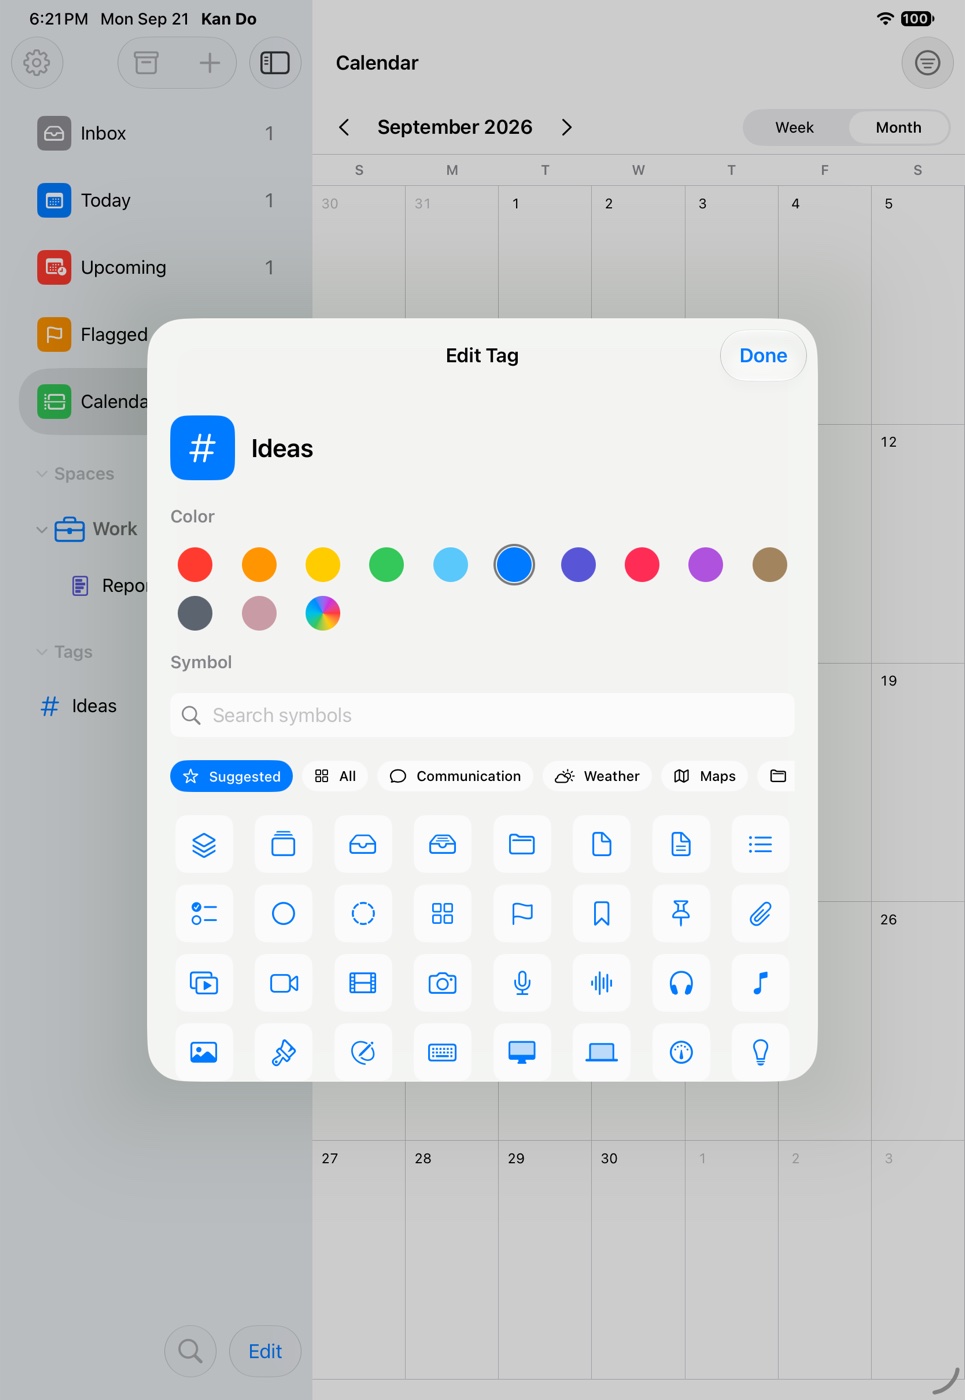
- Name, typed next to the icon.
- Nested Under: None (Top Level) or any other tag that can be a parent. It appears once you have more than one tag.
- Color grid plus a rainbow swatch for a custom color.
- Symbol, with a search field and Suggested, All, and category chips.
Nested tags
Think of nested tags as folders. A "Work" tag can hold "Clients", which can hold "Acme". Each is a real tag you can apply on its own.
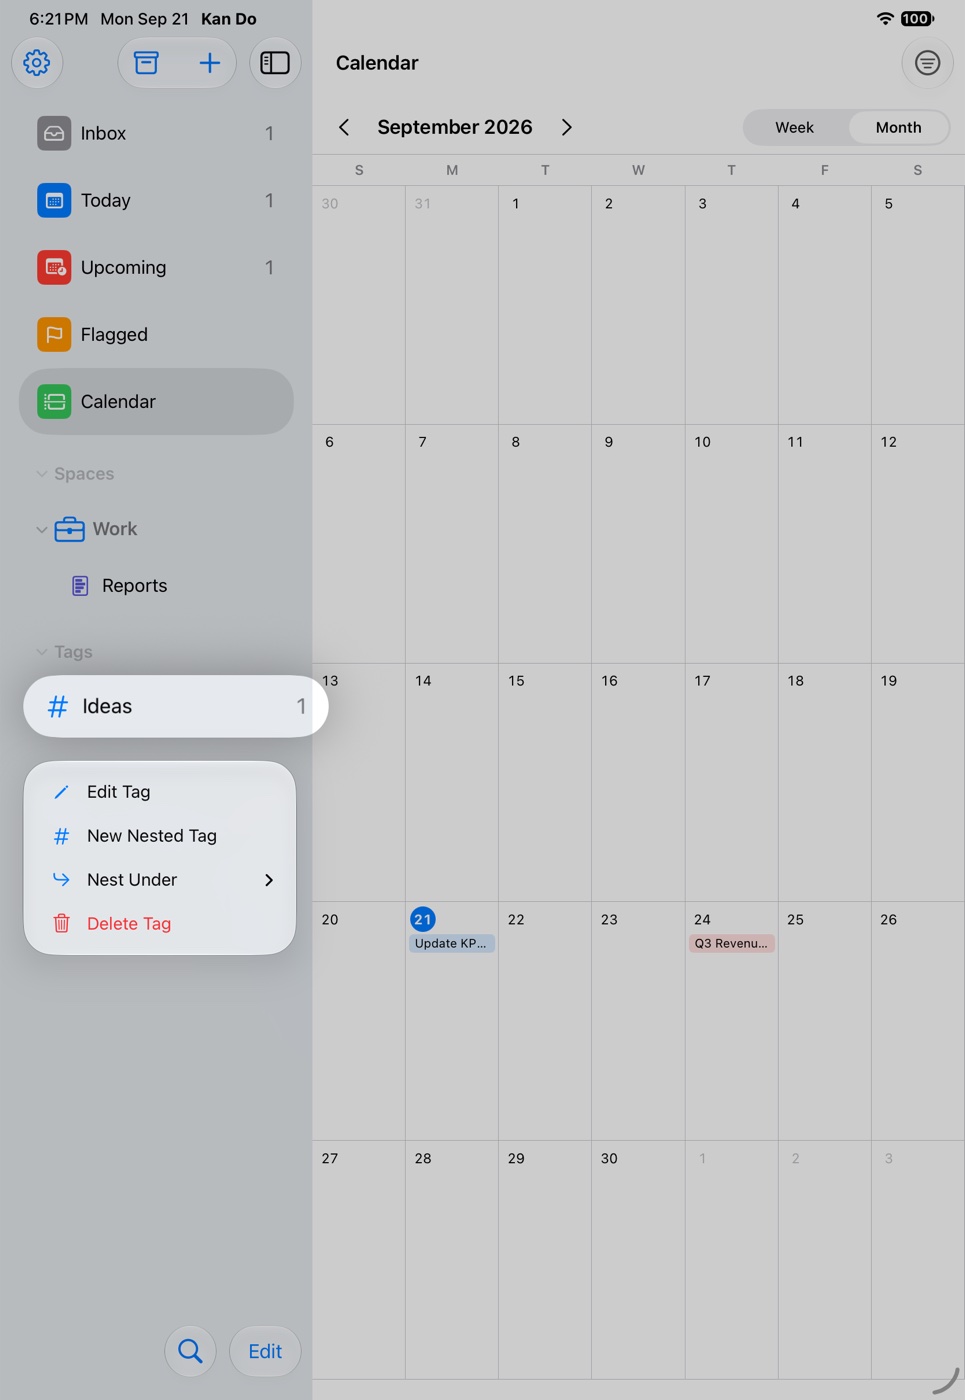
- Create a nested tag with New Nested Tag on the parent, or set Nested Under in the editor.
- Move an existing tag under another with Nest Under in its context menu. The submenu's first item, Top Level, moves it back out.
- Fold a parent's nested tags with the chevron next to it in the sidebar. Kan Do remembers what you folded on each device.
- Reorder by dragging a tag among its siblings. Its nested tags move with it.
- Delete a tag and everything nested under it goes too. The confirmation says so.
How parents behave
Selecting a parent tag shows tasks carrying the parent or any tag nested under it, and the sidebar count works the same way. Filter by Tag on a column, list, or the calendar treats a parent the same way, and nested tags read indented in those menus. In a task's Add Tag menu, a parent with children opens as a submenu, with the parent itself on the first line so it can still be applied directly.
Shortcuts and the AI connector show a nested tag's full path, such as Work/Clients/Acme, so two tags with the same name are easy to tell apart, and the connector can create a whole path in one go.
Applying tags to a task
- Add Tag in the card's context menu lists every tag. A checkmark shows the ones already applied. Tap a checked tag to remove it.
- Tags in the task's details opens a sheet with a Create Tag field and the full list.
- Drag a card onto a tag in the sidebar.
- Select several tasks and use Edit Tags in the selection bar to apply or remove a tag from all of them at once. The sheet's title reads "Tags (N Tasks)".
Tags appear as colored chips on the card and in list rows.
Filtering by tag
- Select the tag in the sidebar to see all of its tasks across projects.
- Filter by Tag in a column's … menu or a list's Sort and Filter menu narrows just that column or list. The choice is remembered per column and per device.
- The Calendar has its own Filter menu with a Tags section.
- Custom smart lists have a full Tags filter with Any / All matching and an Exclude option. See Custom Smart Lists.
Tag appearance in the sidebar
Settings ▸ Typography has Tag Size and Tag Line Height sliders. Settings ▸ Appearance ▸ Sidebar Smart Lists has a Tags toggle that hides the whole section if you don't use tags, and Sidebar Order can move the Tags section above Spaces.
Nested tags are a good fit for anything hierarchical that isn't a project: clients and their accounts, areas of your life, or a "Waiting on" tag with a nested tag per person. Selecting the parent gives you the overview; selecting a child narrows it down.